Jupyter Notebook (iPython) installation on AWS EC2 instance
Cloud computing is a trend nowadays and many companies choose to migrate their load of computation to the clound, especially when big data analysis is involved. The benefits are known: Easy to use, scalable, reliable, secure, high performance etc.
This guide is the first part of Spark installation on AWS and it is about “Jupyter Notebook” installation on AWS cloud.
Apache Spark
“Apache Spark” is an open-source cluster-computing framework. Spark provides an interface for programming entire clusters with implicit data parallelism and fault tolerance. To explain the term “cluster” in plain language imagine a group of computers working like “slaves” under the guidance and instructions of a “master” computer. We often call these computers “nodes”. So the master node is responsible to manage a “queue” of jobs (tasks) and assign each task to an available slave node. That way, we achieve data parallelism and rapid big data processing.
Spark on AWS (or any other cloud platform) offers the option to spin up easily computer instances (they are called “EC2” instances) and let them work as slaves under the guidance of a master node (in Spark we call the master “driver”).
To work with Python and Spark together we have to install PySpark on Jupyter Notebook. Let’s start our guide on how to install Jupyter Notebook.
Jupyter Notebook installation on AWS EC2 instance.
-Log in to your AWS account and select EC2 service.
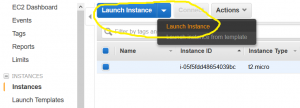
-Choose “Instances” on the left menu and click on the button “Launch Instance”.
-Choose “Ubuntu” image from the list. This will install an Ubuntu Server on our EC2 machine.

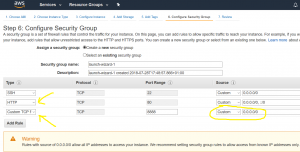
-Click next, next accepting the default settings and go to step 6 to configure security groups. “Security Groups” is were you open ports on your firewall of your EC2 instance. There is always port 22 for “ssh” open in order to connect via ssh (secure shell) to our server. Of course you can modify and change the 0.0.0.0 which means it is open to every single ip address. You can be specific and give only the public ip address of your computer that you use to ssh to aws EC2. Do not worry too much as this example is not for production but only for teaching purposes. However please Do remember to terminate the EC2 instance by the end of this course.
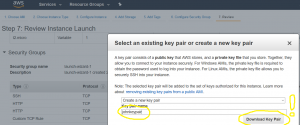
-On the last step just before clicking on “Launch” button you have to give a name to a “new” key pair (public and private). Of course you can choose to use an existing key pair, that you already have saved on your local machine, if this is not your first time you use AWS. For simplicity I will create a new key pair. Remember it is absolutely necessary to save the keypair on your local computer otherwise we will not be able to login to our EC2 server via ssh.
I saved the key under the subdirectory “AWS” inside “MyDocuments”
-Finally click on “Launch”
It will start provisioning our server and after a couple of minutes you will see the status of instace as “running” with a green colour. Now we are ready to ssh on our server. We need the public ip address of our EC2 server.
-Copy the ip address.
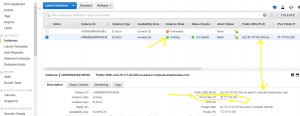
-Open an application like Mobaxterm or Putty to ssh. I prefer Mobaxterm as it can handle keys with “.pem” extensions directly.
-Go to the directory where you saved the public key:
cd MyDocuments/AWS
-Check that you see the “pem” key:
ls
-Connect to our aws EC2 server:
ssh ubuntu@<public_ip_of_your_ec2> -i <name_of_your_key.pem>
replace <public_ip_of_your_ec2> and <name_of_your_key.pem> accordingly
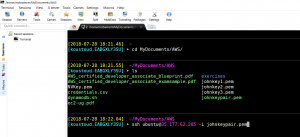
You will login to our ubuntu EC2 server !!

Anaconda and Python
-Open a browser and go to Anaconda repository on the following address
https://repo.continuum.io/archive/
In order to understand the relationship between Python and Anaconda, think about Linux and Redhat. It is exactly the same: a company named “continuum” gathers a lot of Python libraries together (more than 200) and makes a Python distribution under the name “Anaconda”.
We will choose “Anaconda3-4.1.1-Linux-x86_64.sh”

-Downlad this file:
wget http://repo.continuum.io/archive/Anaconda3-4.1.1-Linux-x86_64.sh
-Install the anaconda3 python distribution:
bash Anaconda3-4.1.1-Linux-x86_64.sh
(hit Enter to see the license and type yes after that and wait for the installation to be completed)
on the last question:
“Do you wish the installer to prepend the Anaconda3 install location” type “yes”
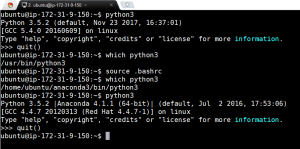
-Check if python runs from Anaconda distribution or from default binary path. Type:
which python3
if you get as a result:
/usr/bin/python3
That is not good, because python3 runs form default binary and not from Anaconda3 distribution.
try to evaluate .bashrc with the following command:
source .bashrc
after that check again:
which python3
if you get as a result:
/home/ubuntu/anaconda3/bin/python3
then you are fine. You can double check if you run python3 and see if python runs under anaconda. You can quit with:
>>>quit()
Generate certificate
-create directory “certification” and move inside:
mkdir certification cd certification
-create openssl certificate with the name “cert.pem”
openssl req -x509 -nodes -days 365 -newkey rsa:1024 -keyout cert.pem -out cert.pem
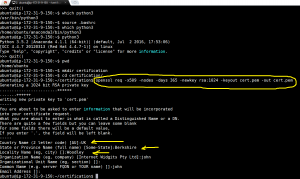
you will be asked a bunch of questions. It’s not necessary to reply to all of them.
Jupyter Notebook Configuration
-Create jupyter configuration file:
jupyter notebook –generate-config
-Edit file ~/.jupyter/vim jupyter_notebook_config.py with vim
vim ~/.jupyter/jupyter_notebook_config.py
-Add the following lines in the begining of the configuration file
hit “i” to change mode to “inserting” and add the following
c = get_config()
c.NotebookApp.certfile = u’/home/ubuntu/certification/cert.pem’
c.NotebookApp.ip = ‘*’
c.NotebookApp.open_browser = False
c.NotebookApp.port = 8888

hit “Esc” and then save and quit typing “:wq!”
:wq!
Start Jupyter Notebook
Start jupyter notebook by typing:
jupyter notebook

Open Jupyter Notebook from EC2 instance
-Go back to the AWS console and copy the EC2 “public DNS”. Then
-Open a new tab on your browser and go to the public DNS page of your server followed by colon and port 8888 “:8888”
https://<public_DNS_of_EC2> :8888
Your browser may warn you that this is not a secure site. Please add an exception and proceed.
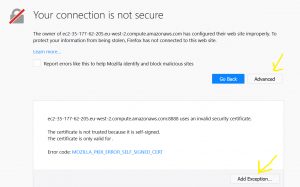
If everything went OK, you will see your favorite Jupyter Notebook running on you EC2 instance on AWS!!!

-Quit Jupyter Notebook
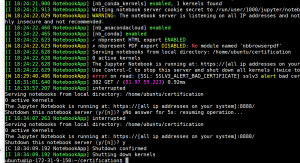
Go back to your terminal and hit “Ctrl+C” to quit Jupyter Notebook
Do not forget to terminate your EC2 instance.
(In case you want to proceed to second part and install Apache Spark, please ignore this for the moment)